Save $14.00
We guarantee the best price in Canada—before or 30 days after purchase.*
Lowest Price Guarantee*
Call to Order: +1 (866) 696-7189
Prefer to chat? Click the chat icon below
This product is backorderable
Product Description
Product Description
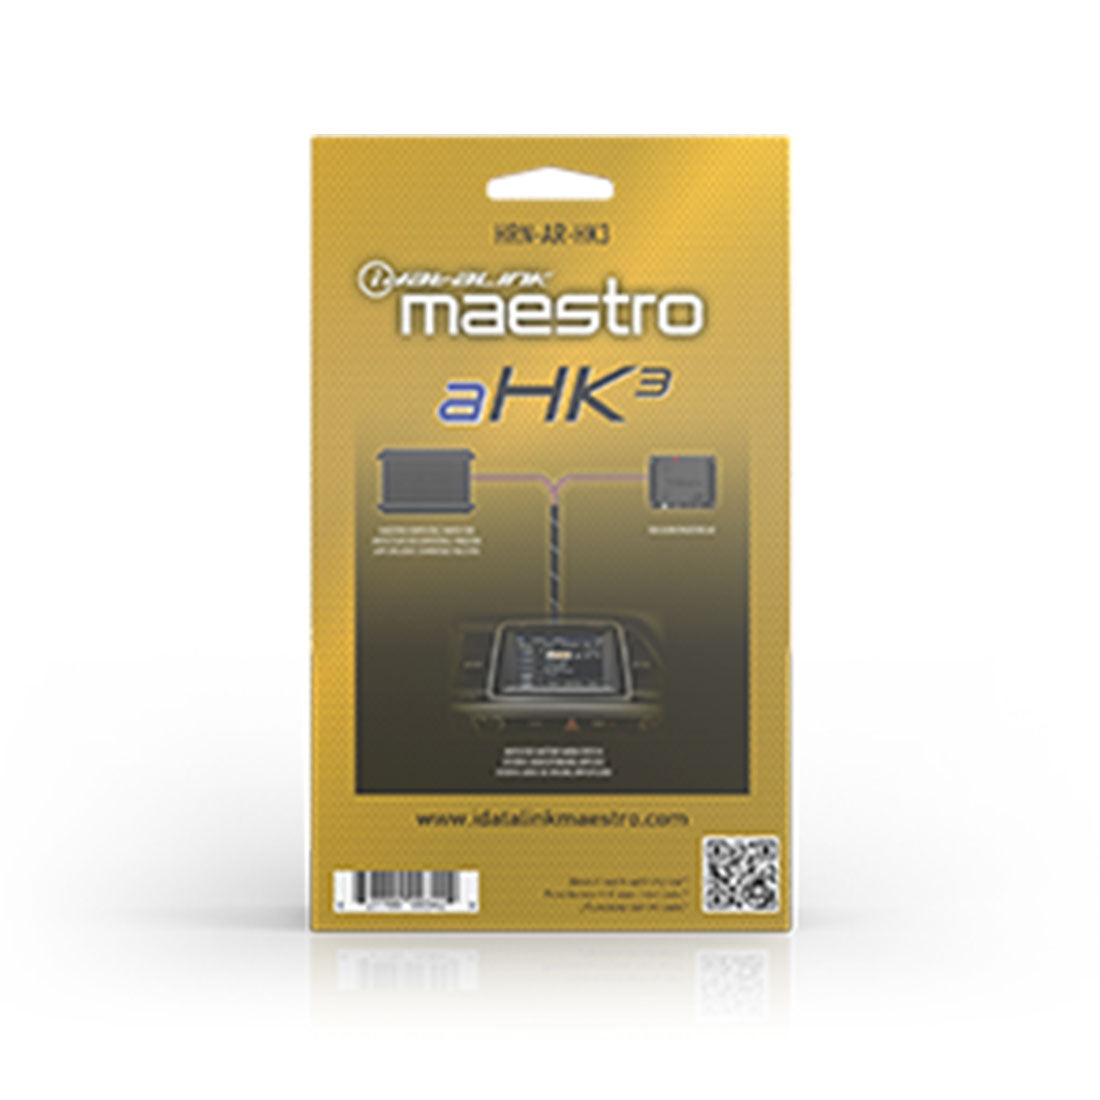
iDatalink Maestro HRN-AR-HK3 Amplifier Replacement Harness for Select Hyundai and Kia Vehicles
The HRN-AR-HK3 amplifier replacement harness is designed for select Hyundai and Kia vehicles with factory amplified audio systems such as Harman Kardon. This harness comes equipped with everything needed to install a Maestro amplifier replacement module, simplifying the replacement of your factory amplifier. In most cases, an aSPDIF signal converter (sold separately) will also be required, unless the digital signal processor has a dedicated SPDIF input.
Compatibility
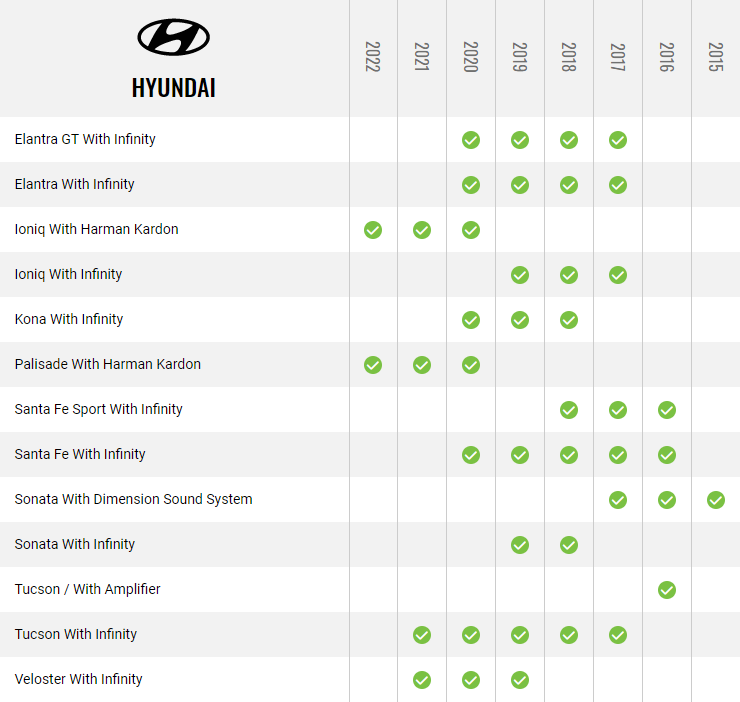
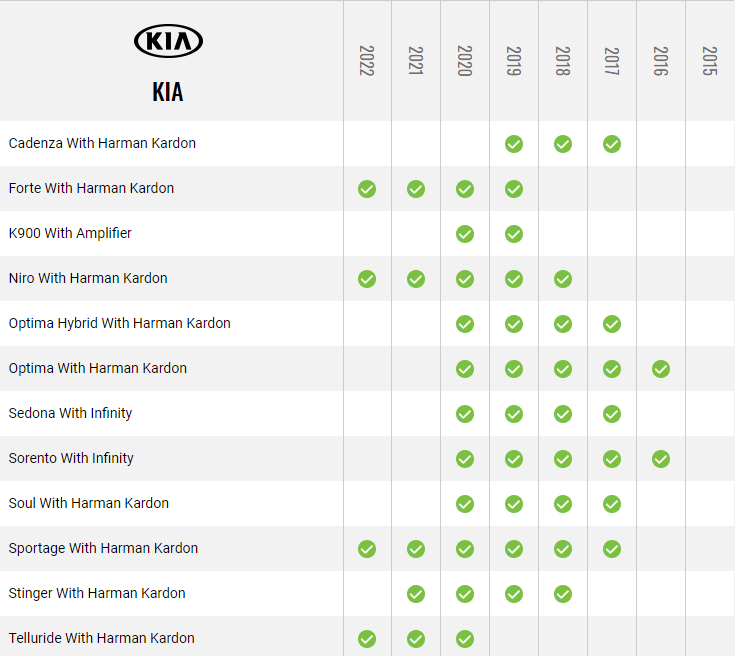
The HRN-AR-HK3 amplifier replacement harness is designed for use in select Hyundai and Kia vehicles with factory amplified audio systems such as Harman Kardon. It is compatible with a variety of models. For a full list of compatible models, consult the product manual, or see chart below.
Features
The HRN-AR-HK3 amplifier replacement harness includes several features that make it a reliable option for upgrading your car's audio system. These features include: Maestro amplifier replacement module - The harness comes equipped with a Maestro amplifier replacement module, which allows for seamless integration with the car's factory audio system. Plug-and-play installation - The harness is designed to be a plug-and-play installation, which means it requires minimal wiring and can be easily installed without the need for professional help. Signal converter - In most applications, an aSPDIF signal converter (sold separately) is required unless the digital signal processor has a dedicated SPDIF input.
Installation
Installing the HRN-AR-HK3 amplifier replacement harness is a straightforward process that can be completed in a few easy steps. Here is a brief overview of the installation process: Step 1: Disconnect the negative battery terminal. Step 2: Remove the factory-installed amplifier and disconnect any wiring. Step 3: Connect the HRN-AR-HK3 harness to the factory wiring. Step 4: Install the Maestro amplifier replacement module in the designated location. Step 5: Connect the aSPDIF signal converter (sold separately) to the new amplifier, unless the digital signal processor has a dedicated SPDIF input. Step 6: Reconnect the negative battery terminal.
Compatibility Chart


